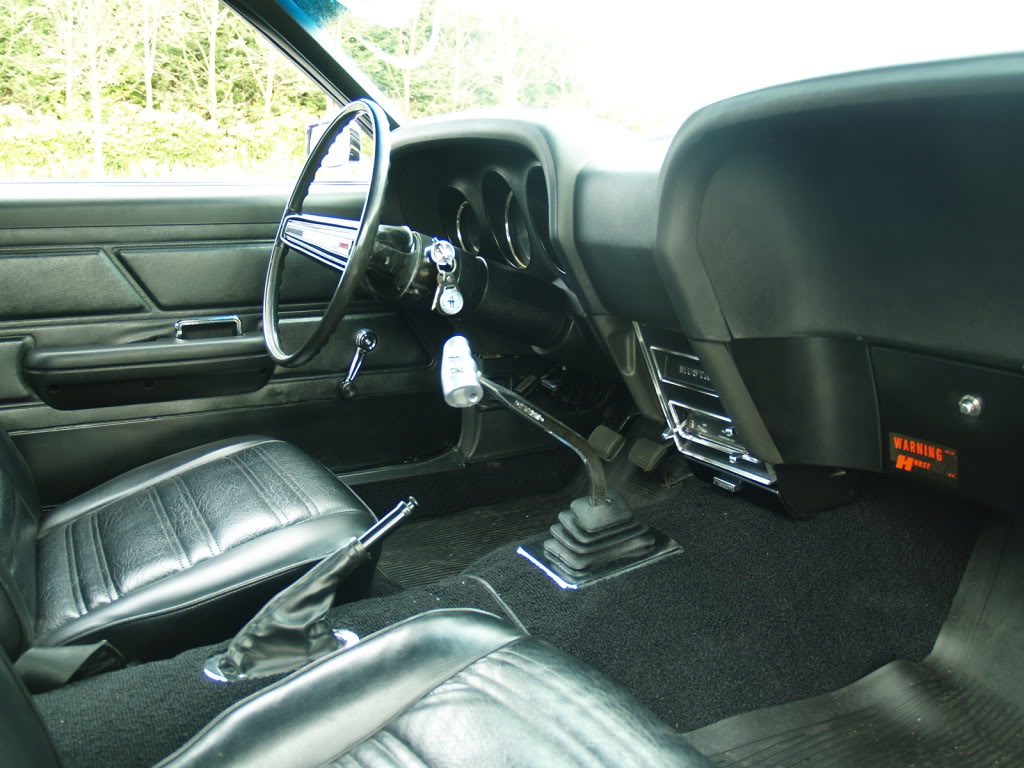
The choice for a Lokar E-Brake was very easy. SAFETY !
Hitting the parking brake ( lower left ) in an emergancy situation can be a real challenger... a Challenge I don't want to take if the time is there. Lokar makes a brake that looks old-skool, that does not scream i'm new and has the same look as the Hurst shifter if you compare the boot.
I have to say, this stuff is not cheap... but when you hold the stuff you know you paid for quality and that is something I don't say that often because I'm real skeptic.
As for the installation, LOKAR forgot to mention to take the drive shaft hight in to account. This got me in to trouble from the start. People who are consider this build, please take note to the following !

The clearance for the brake
First: you have to choose the placement of the brake. You might want to consider placing it a little further forward, rather than to the back. The drive shaft moves up and down when driving and since the cables for the braking are attached beneath it needs the correct amount of clearance.
In my case I bolted the brake as mentioned in the paper work. Good for some scrapes and noises you don't want to hear...
It scraped the drive shaft only a bit... so back to the drawing board.

The second step was to move the mount to the top instead of underneath, good for 2 more mm's of clearance... but still not enough. I decided to put 4- 1mm washers under the bolts and that did the job I had clearance for driving but with some serious driving it banged the shaft again once in a while.

Seal to prevent water splashing from underneath

brake V1.0

the look underneath, mount and brake cables
The problem is not the rising of the brake, its the floor mats / carpet and all you have to adjust to make it smooth. In my case I moved the entire mount up again and this time with 1,3 cm ( rather radical ) but I have no more then enough clearance (+/- 4mm underneath). The extra hight it took, i filled with underlay mend carpet and smoothened it out. Result is absolute stunning !
[NOTE] attaching of the bezel on this hight was also a real challenge ! because the screws needed to find the floor and the holes of the bezel it self. The screws must go through 3 layers of under laymend and stuff. I used a very long screw dryer from underneath to let the screw follow the screw dryer from underneath. It might get you angry, don't give into it :)

No comments:
Post a Comment